DIY Idea
An Anniversary Map Shadow Box — Pinned and Strung Year by Year
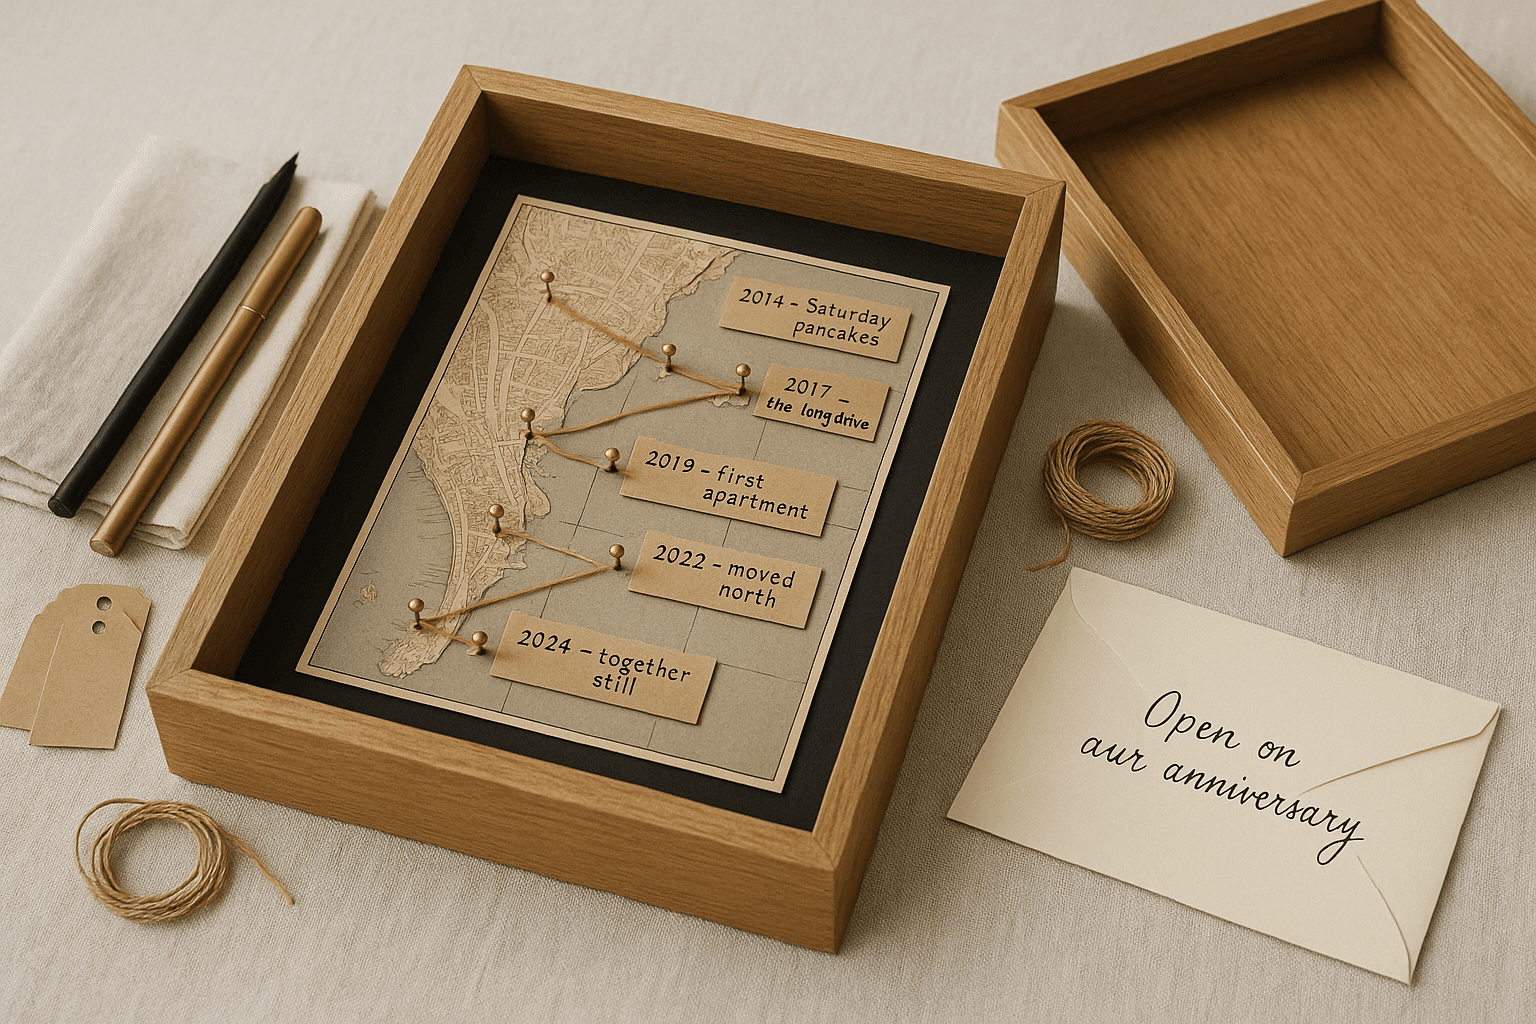
A shadow box framing a printed map, with pins marking the places, string tracing the years, and small kraft tags naming each one. Built for your partner, from the places you've shared. Giving it to a couple in your family, like your parents on their anniversary? Map their places, not yours, label the envelope “Open on your anniversary”, and write the card about the two of them. Two evenings.
Materials
- The frame: an 8 × 10 in shadow box with at least 1 in of inside depth and a hanger on the back, plus a sheet of ½ in (12 mm) foam board cut to fit its back panel with a craft knife and ruler
- The map: one printed map of a place that holds the story — your city, their hometown, the one trip you keep coming back to — sized to the frame, mounted with a glue stick on a sheet of black cardstock
- The timeline: one map pin per place (eight to twelve) plus one spare for tip 1, with shafts no longer than ⅜ in (10 mm) so they stay inside the foam board, one length of fine waxed twine or embroidery floss (about 8 ft), one small tube of clear craft glue for the pin ends
- The year tags: a sheet of kraft cardstock cut into 1 × 2 in tags with scissors (one per place plus a blank spare), a pencil for marking the places, one fine-tip black archival pen, one metallic gel pen (gold or silver) for the title, a roll of clear tape, and (optional) a few inches of narrow ribbon for milestone pins
- The Open-When letter: one 4 × 6 envelope labeled Open on our anniversary, one cardstock insert, one piece of low-tack tape to fix it to the outside back of the box
The string is the bond. The pins are the places. The tags say why each one mattered.
Instructions
- 01
Pick the places. Eight to twelve locations that anchor the years — the apartment with the broken radiator, the diner you went to after the wedding, the trailhead you keep coming back to. Pencil small dots on the map; if a year is empty, leave it empty. The gaps are honest.
- 02
Title the lid and mount the map. With a glue stick, smooth the printed map onto the black cardstock from the center out, no bubbles. Then glue the cardstock onto the foam board so the pins have something to hold, and fit the board into the box in front of its back panel. Hand-letter the title across a kraft strip taped above the map: Our Adventures: [first year]–[this year]. Use the metallic pen so it reads at a distance.
- 03
Push the pins and run the string. Pin each penciled location in chronological order. Glue the string end to pin one, wrap once around the pin head, stretch to pin two, wrap once, continue. Taut but not warping. The string is the route; the route is the relationship.
- 04
Write the year-tags. On each kraft rectangle, two lines: the year on top, two-to-four words below. 2014 — Saturday pancakes. 2017 — the long drive. 2022 — the year we almost moved. Tape each tag near its pin. Specificity is what makes a tag land — good year dies, 2018 — Tuesday hospital doesn't.
- 05
Fix the Open-When letter to the back. Write the card per the What to write inside card below. Seal the envelope, label it Open on our anniversary, and fix it to the outside back of the box with low-tack tape, clear of the hanger. Each year they can lift the box down and open the note without disturbing the map. The note lives on the frame; the frame lives on the wall; the note gets re-opened every year.
What to write inside
Open on our anniversary.
Three things, three sentences each:
-
What I admire about you now — the version of you in front of me this year, not the one I met.
-
One memory I'm grateful for — pin it on the map yourself if you want. Add the year.
-
One adventure for this next year — a place we haven't pinned yet.
— [your name]
Sign however you would — With love, Always, or just your name.
Pro Tips
- Leave one pin loose. Tape an extra pin and a blank kraft tag to the back of the frame with a small note: for the place we go this year. Turns the shadow box from a finished artifact into a yearly tradition.
- Tape the tags, don't glue them. If the story changes — a new place, a corrected year — you swap a tag, not the whole build.
- One string color. Two colors splits the eye and makes the build look like a school project. Use a single thread for the through-line; if a year is a milestone (wedding, baby, move) tie a small ribbon at that pin instead.
- Check the pins before you start. Push one pin into a corner of the foam board: its point should stay inside the board, not reach the back panel. If it pokes through, use shorter pins.