DIY Idea
A Whiteboard in a Box — Wall Roll, Markers, Twelve Starting Prompts
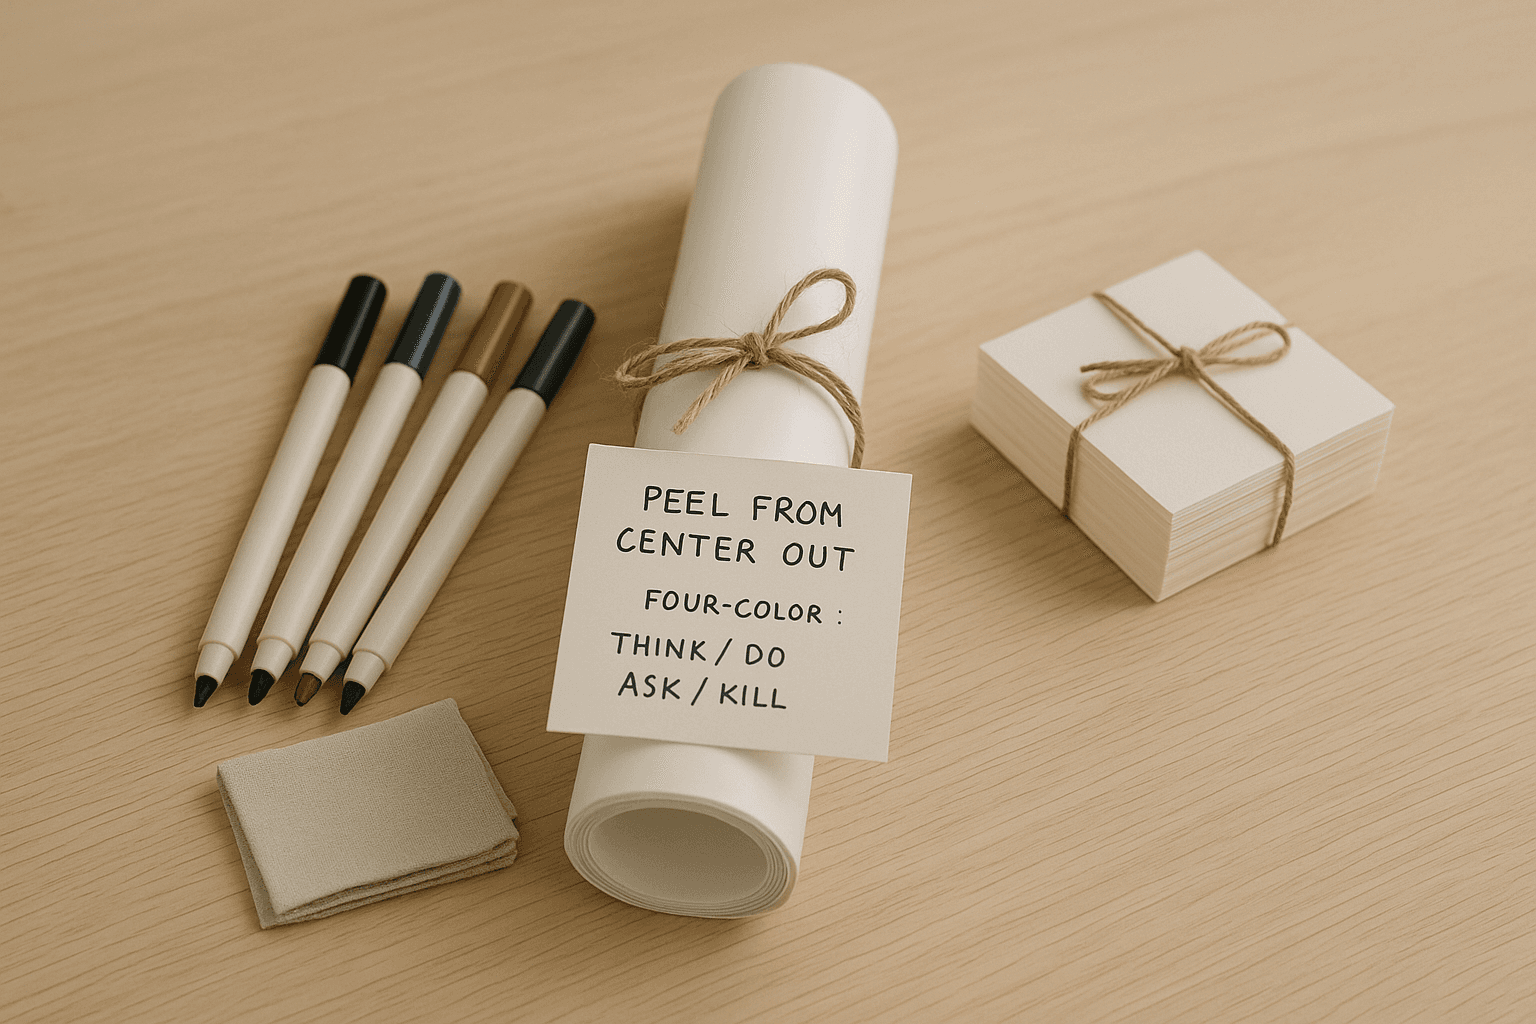
A roll of stick-up whiteboard paper, four good markers, and twelve prompt cards to break the blank-page panic. Built for someone starting a project — a new role, a thesis, a side hustle, a pivot. Twenty minutes to assemble.
Materials
- One roll of removable adhesive whiteboard wall paper (24×36 in.; check its label for which walls it suits)
- Four fine-tip dry-erase markers in four colors
- A microfiber eraser cloth
- Thirteen blank 3 × 5 in index cards — twelve for the prompt set (see pro tips), one for the install card — and a fine-tip pen
- A long kraft box with a fitted lid, about 26 × 7 × 4 in, so the 24-in roll lies flat with the markers and cards beside it
- A handwritten note tied to the marker bundle, twine for the roll and the note, and four small color-dot stickers for the marker caps. A tape measure (yours) to check their wall
Ideas need somewhere to land before they make sense.
Instructions
- 01
Size the roll to a real wall. Measure their available wall first (or ask): a 24×36 in. sheet fits most home offices, and it needs a smooth patch at least that size. Check the sheet's label for which wall surfaces it suits. Don't guess on this.
- 02
Assign each marker a job. Four colors, four meanings: think (idea), do (action), ask (open question), kill (cut). Mark each cap with a small color sticker so the code stays visible.
- 03
Write the twelve prompt cards. One prompt per index card, in print not cursive. Use the starter list in pro tips, or write your own. These are the first thing they'll reach for when the wall is empty.
- 04
Stage the box. Whiteboard rolled tight and twine-tied. Marker bundle on top, prompt cards stacked on the side, eraser folded flat underneath. The handwritten note rides on top.
- 05
Add a two-sided install card. One side: how to apply, copied in plain words from the whiteboard sheet's own instructions, plus the surfaces its label says it suits. Other side: the four-marker code, so they don't lose it when the stickers fade.
What to write inside
For your next chapter — whatever it ends up being.
The wall is the easy part. The hard part is the showing up. Twelve prompts on the cards to start with; the rest is yours. When it gets messy and you can't tell what's noise and what's signal, that means it's working.
— [your name]
Sign however you would — All my best, Rooting for you, With pride, or just your name.
Pro Tips
- A starter prompt set worth stealing: What does done look like? Who else has solved this? What's the smallest version? What am I avoiding? What can I cut? Who do I need to call? What's the one decision blocking everything? What's true even if I'm wrong? What's the next 48-hour move? What did last week teach me? What would I tell a friend doing this? What does momentum look like by Friday?
- The wall is the gift, but the four-marker code is what makes it work. Without categories, a whiteboard becomes a wall of noise inside a month.
- Resist the bullet-journal trap. This is a thinking surface, not a tracking surface. If they treat it like a planner — habit dots, weekly spreads — the magic dies in two weeks.
- For renters or anyone wall-shy: stick the same whiteboard sheet onto a 24 × 36 in foam-core board (sold separately) and lean it against a wall. Plain foam-core won't wipe clean, so the sheet goes on the board. Note this option on the install card.